How to Fix a Blank Page That Won't Delete in Word

A step-by-step guide to fixing a blank page that won't delete in Word.

TL;DR
Blank pages in Word can't be deleted directly. Show hidden formatting symbols (¶), then fix it based on the cause: use Fn+Delete to remove a break symbol, or hide the paragraph mark inside the previous page by setting its font size to 1pt and paragraph spacing to 0pt.
My Situation
I was trying to keep only page 2 of an official document and delete the unnecessary pages 1 and 3, but Backspace simply wouldn't remove them.
Cause
Word protects the last paragraph mark (¶) in a document and will not allow it to be deleted, because it stores the formatting information for the entire document.
In my case, the page before the blank one contained a table. Word automatically adds a paragraph mark after every table, and when that mark overflows onto the next page, a blank page is created.
This means it's impossible to delete the blank page directly — the solution is to hide the paragraph mark within the previous page.
Types of Blank Pages
There are 3 types. First, display hidden formatting symbols using the shortcut below or by clicking the Show/Hide ¶ button in the Home tab.
Command + 8 (Windows: Ctrl + Shift + 8)
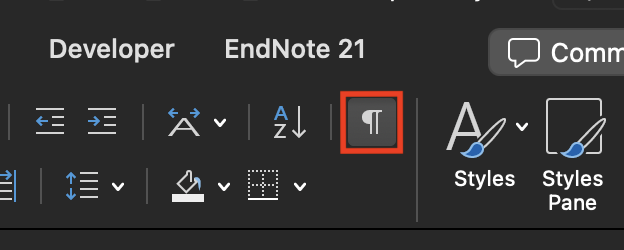
This reveals hidden symbols such as paragraph marks, page breaks, and section breaks.
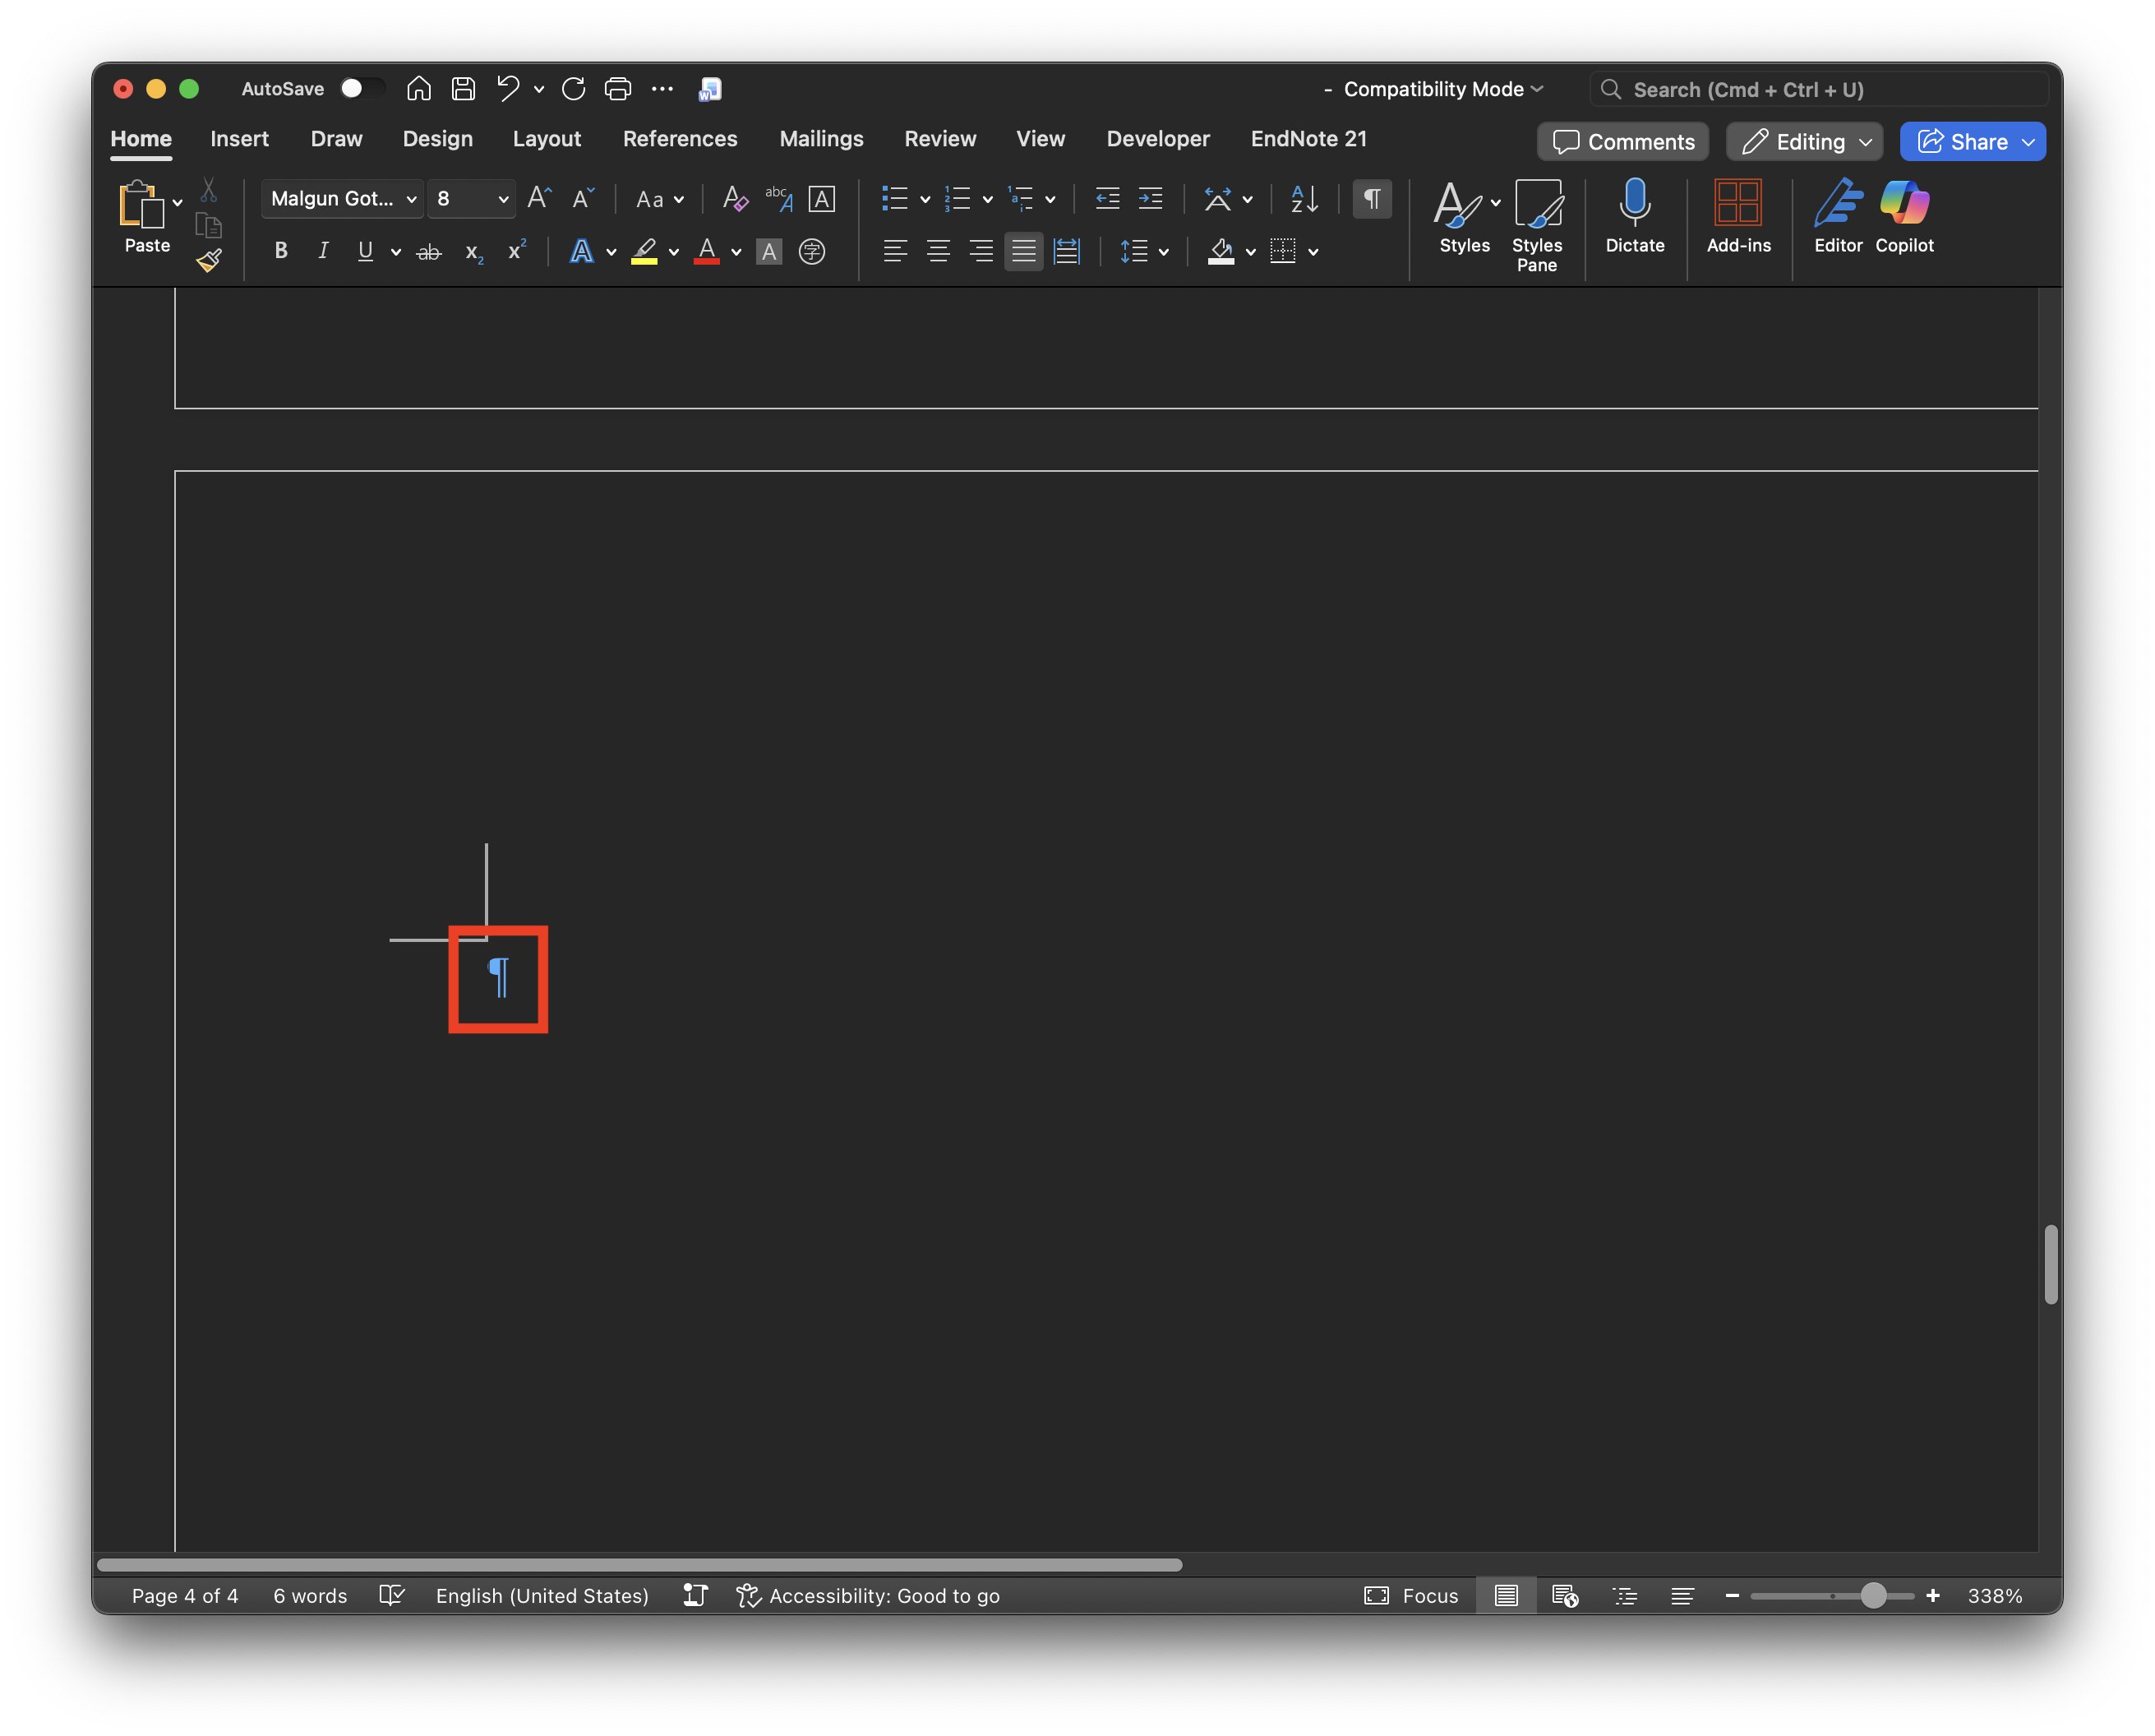
- Only a ¶ symbol is visible → Non-deletable paragraph mark (use Method 2)
Section Break (Next Page)is displayed → Section break is the cause (use Method 1)Page Breakis displayed → Manual page break is the cause (use Method 1)
Solutions
1. Section Break / Page Break
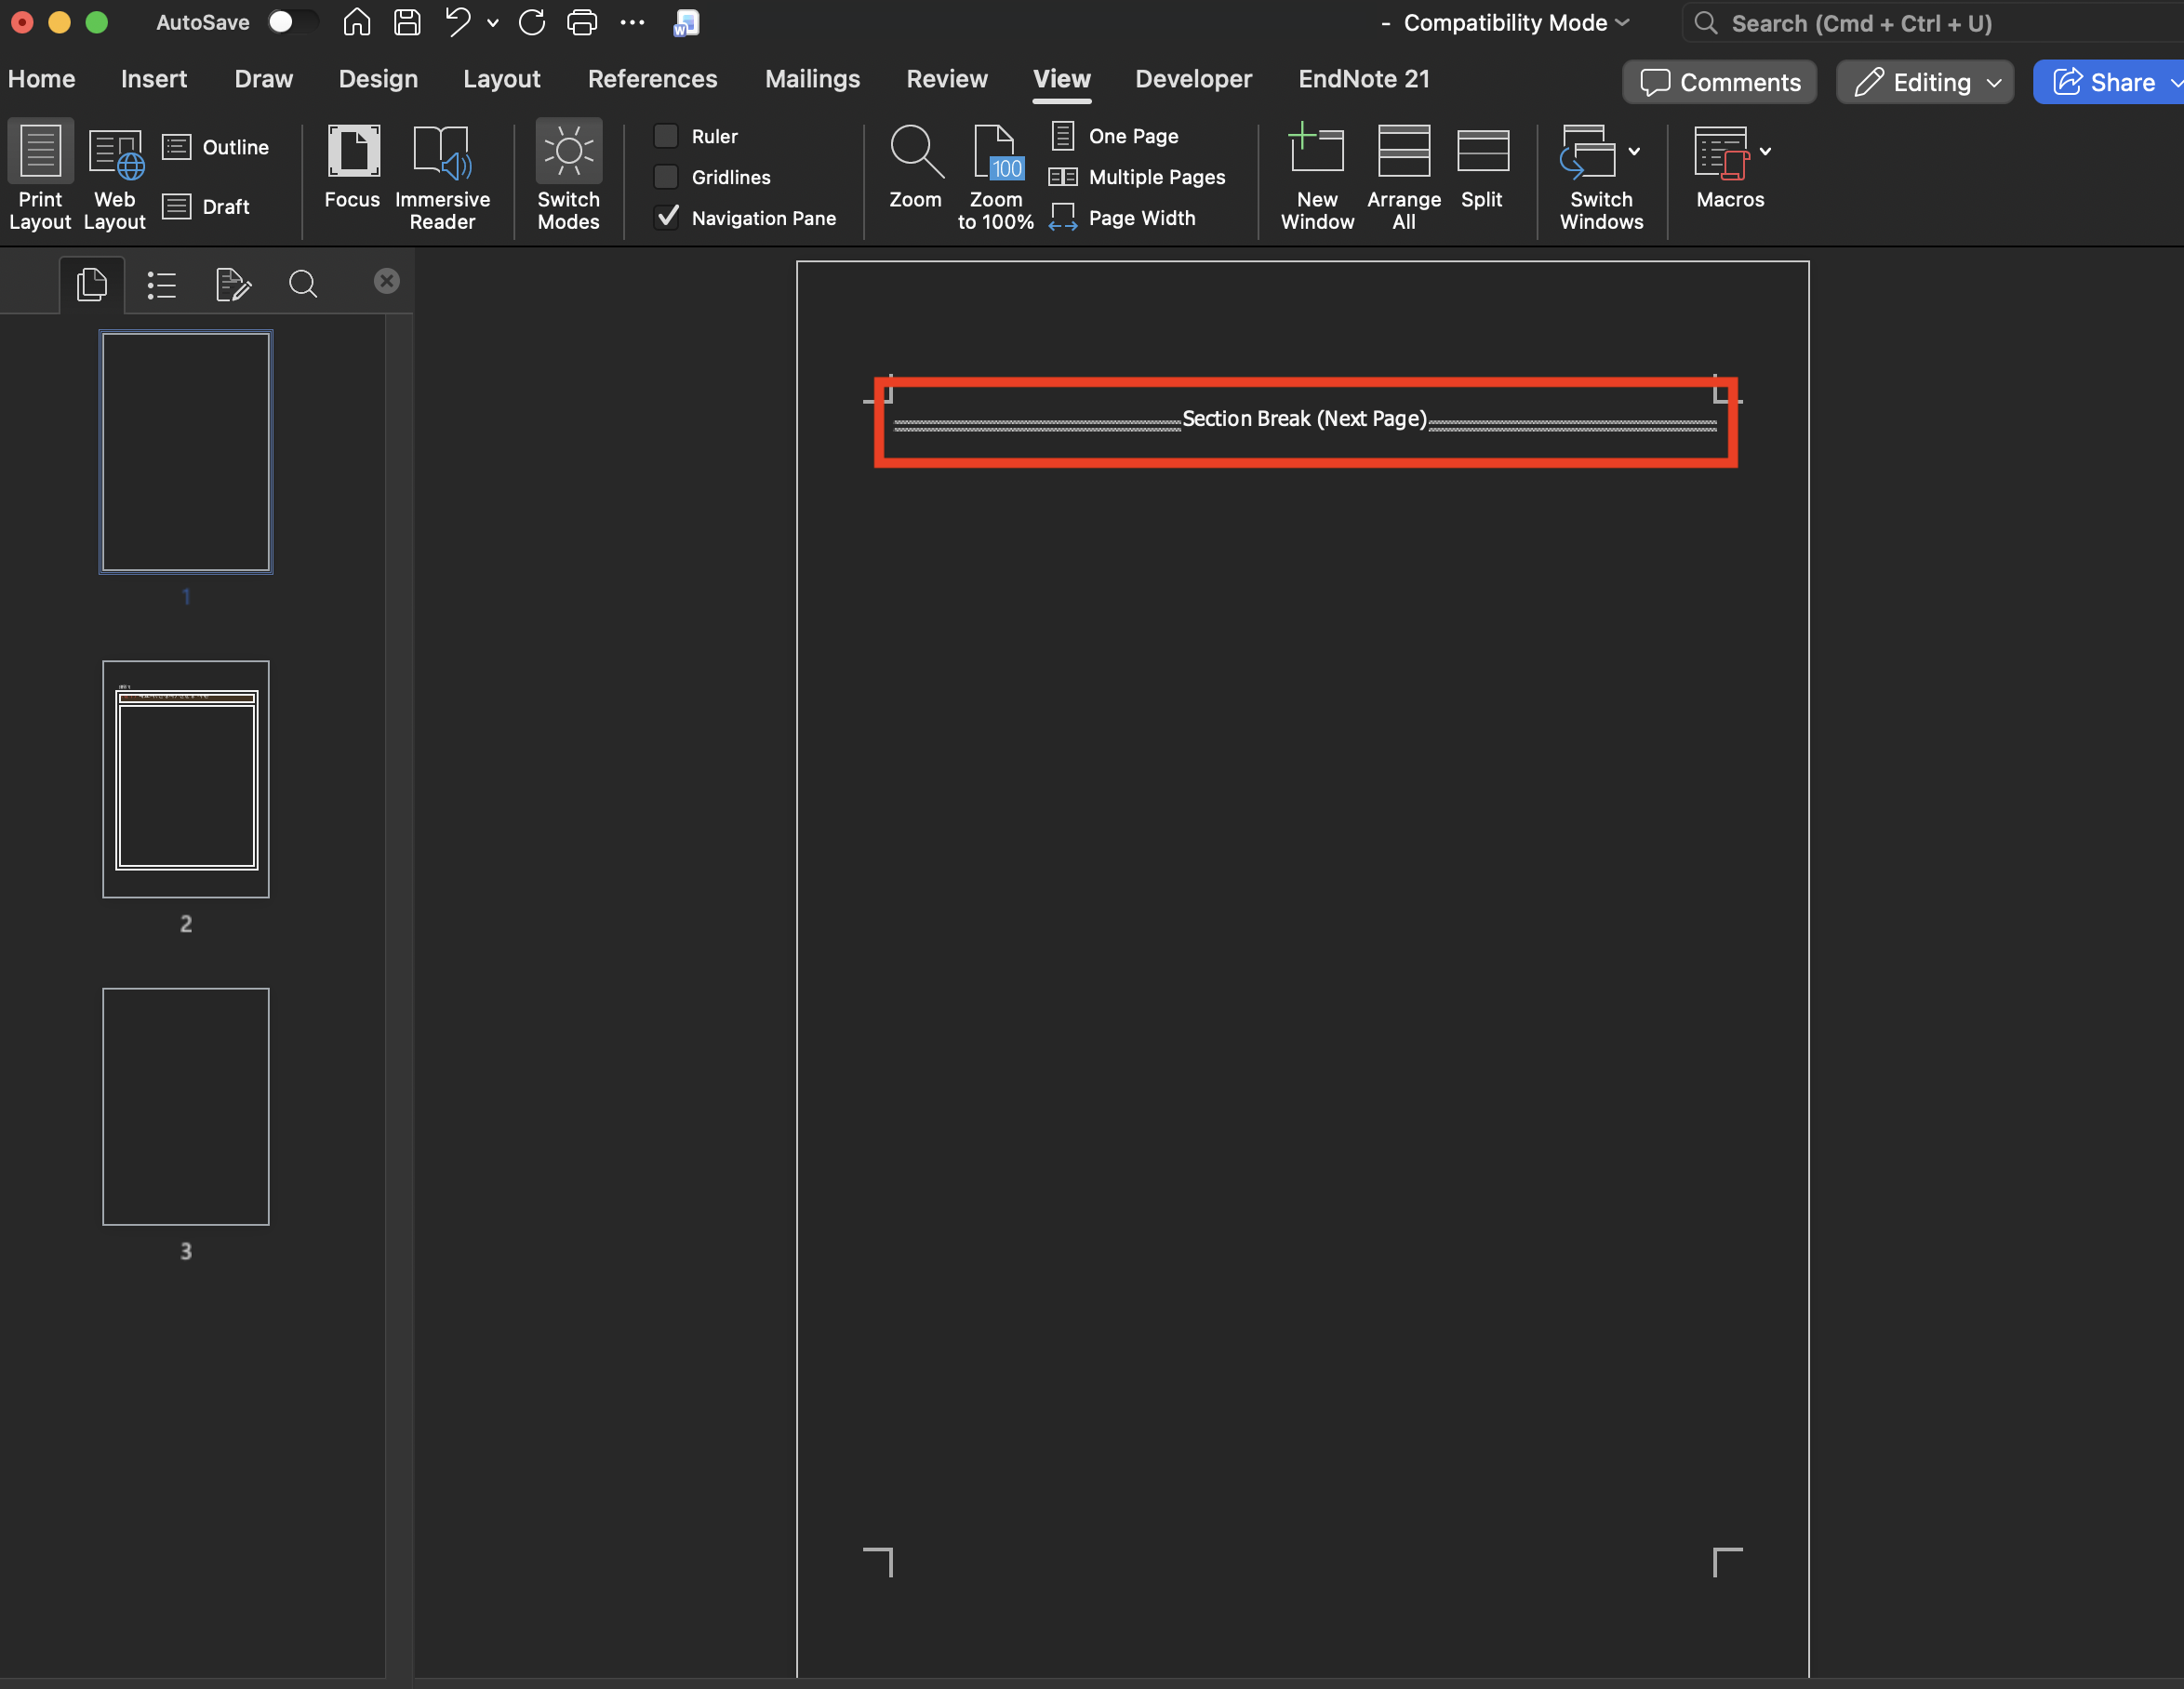
Place the cursor immediately before the symbol and press Fn + Delete. (Windows: Delete)
2. Non-Deletable Paragraph Mark (¶)
There are 3 methods.
Method 1. Reduce Font Size to 1pt
- Display hidden formatting symbols. (See the Types section above)
- Click the ¶ symbol on the blank page to select it.
- Type
1in the font size box and pressEnter
The paragraph mark shrinks so small that it fits within the previous page, and the blank page disappears.
This didn't work for me alone, so I combined it with Methods 2 and 3 below.
Method 2. Adjust Paragraph Spacing
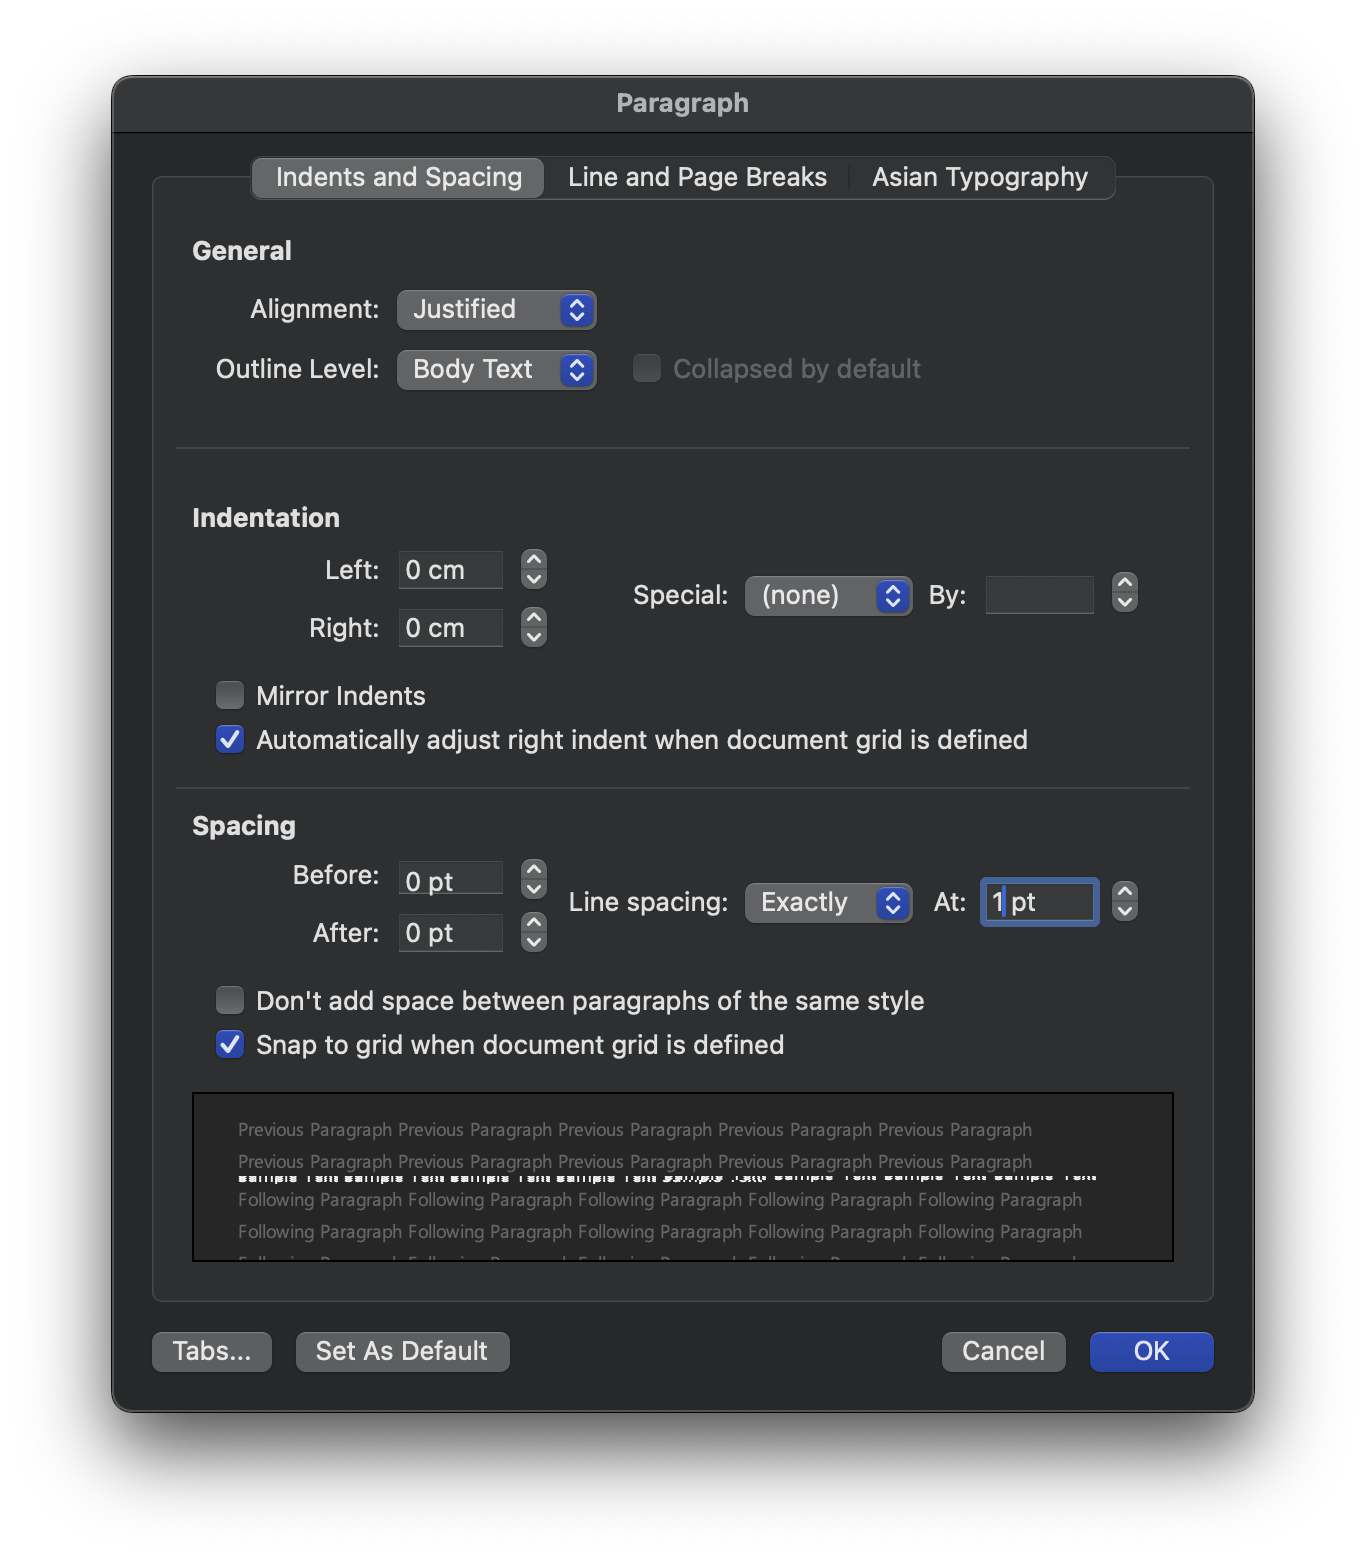
- Select the ¶ symbol → right-click → Paragraph
- Line Spacing:
Exactly/1pt - Before / After:
0pt - Go to the Line and Page Breaks tab and uncheck all of the following:
- Keep with next
- Keep lines together
- Page break before
Method 3. Reduce Page Margins
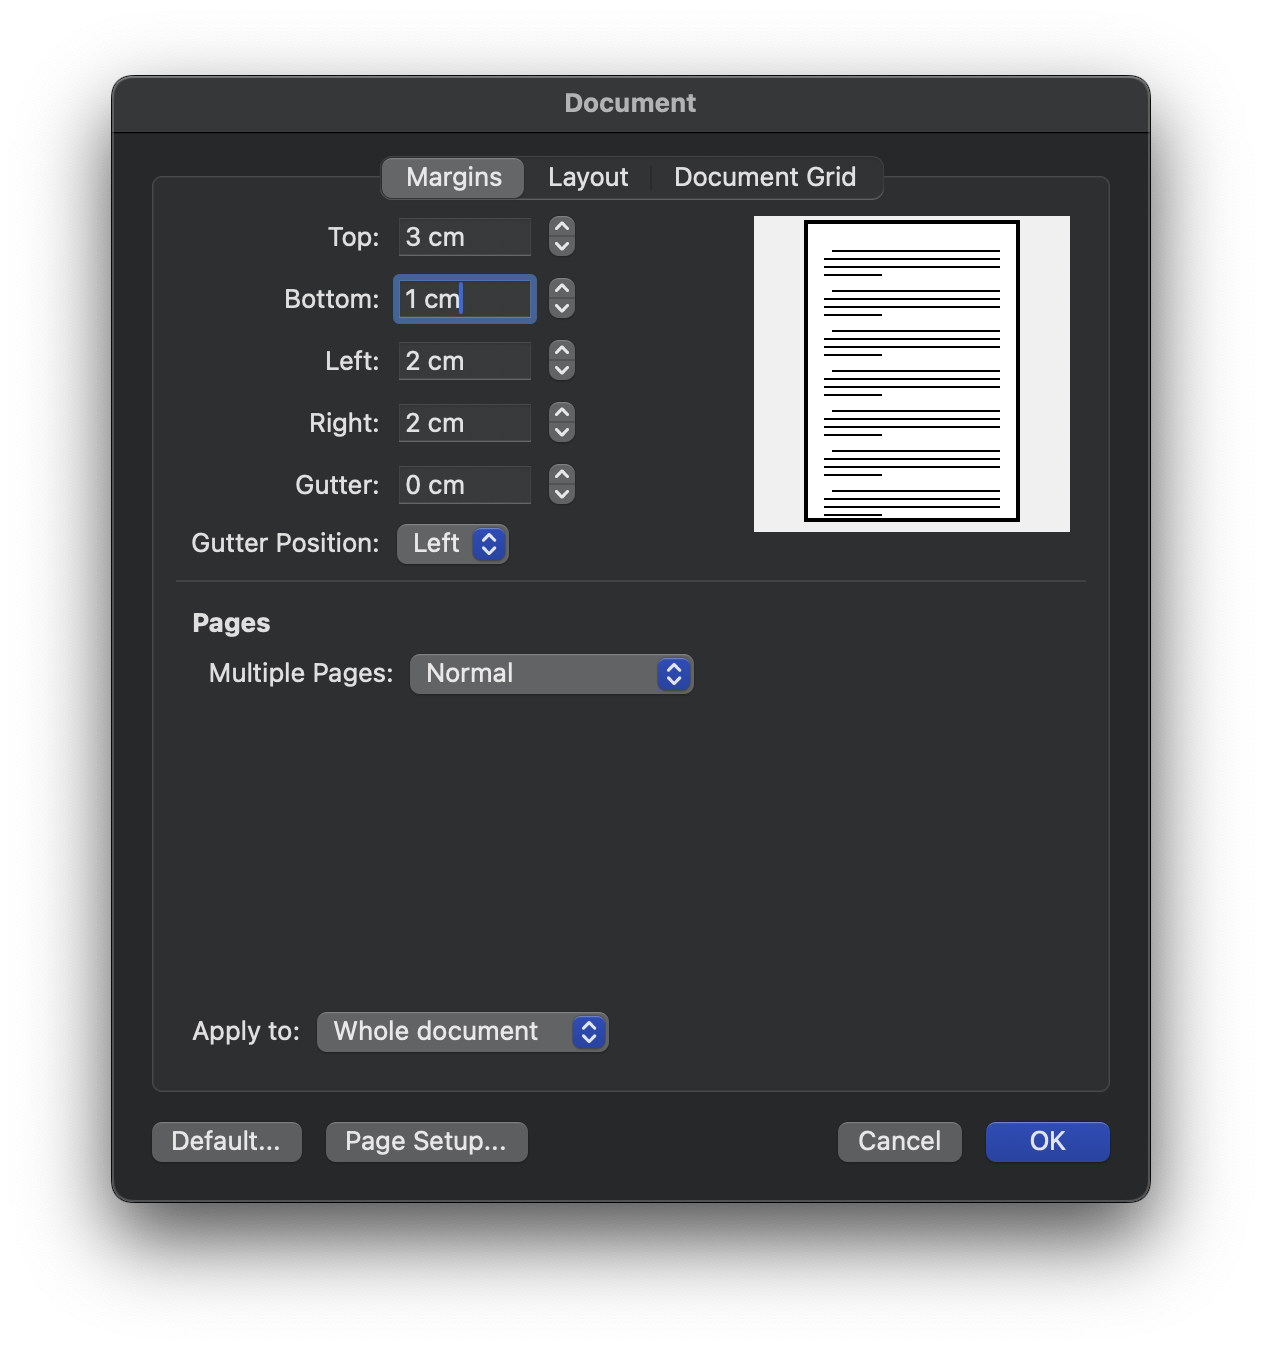
- On the page just before the blank page, go to Layout → Margins → Custom Margins
- Reduce the Bottom margin. (I reduced mine from 3pt to 1pt.)
If You're Exporting to PDF
Method 1. Print to PDF
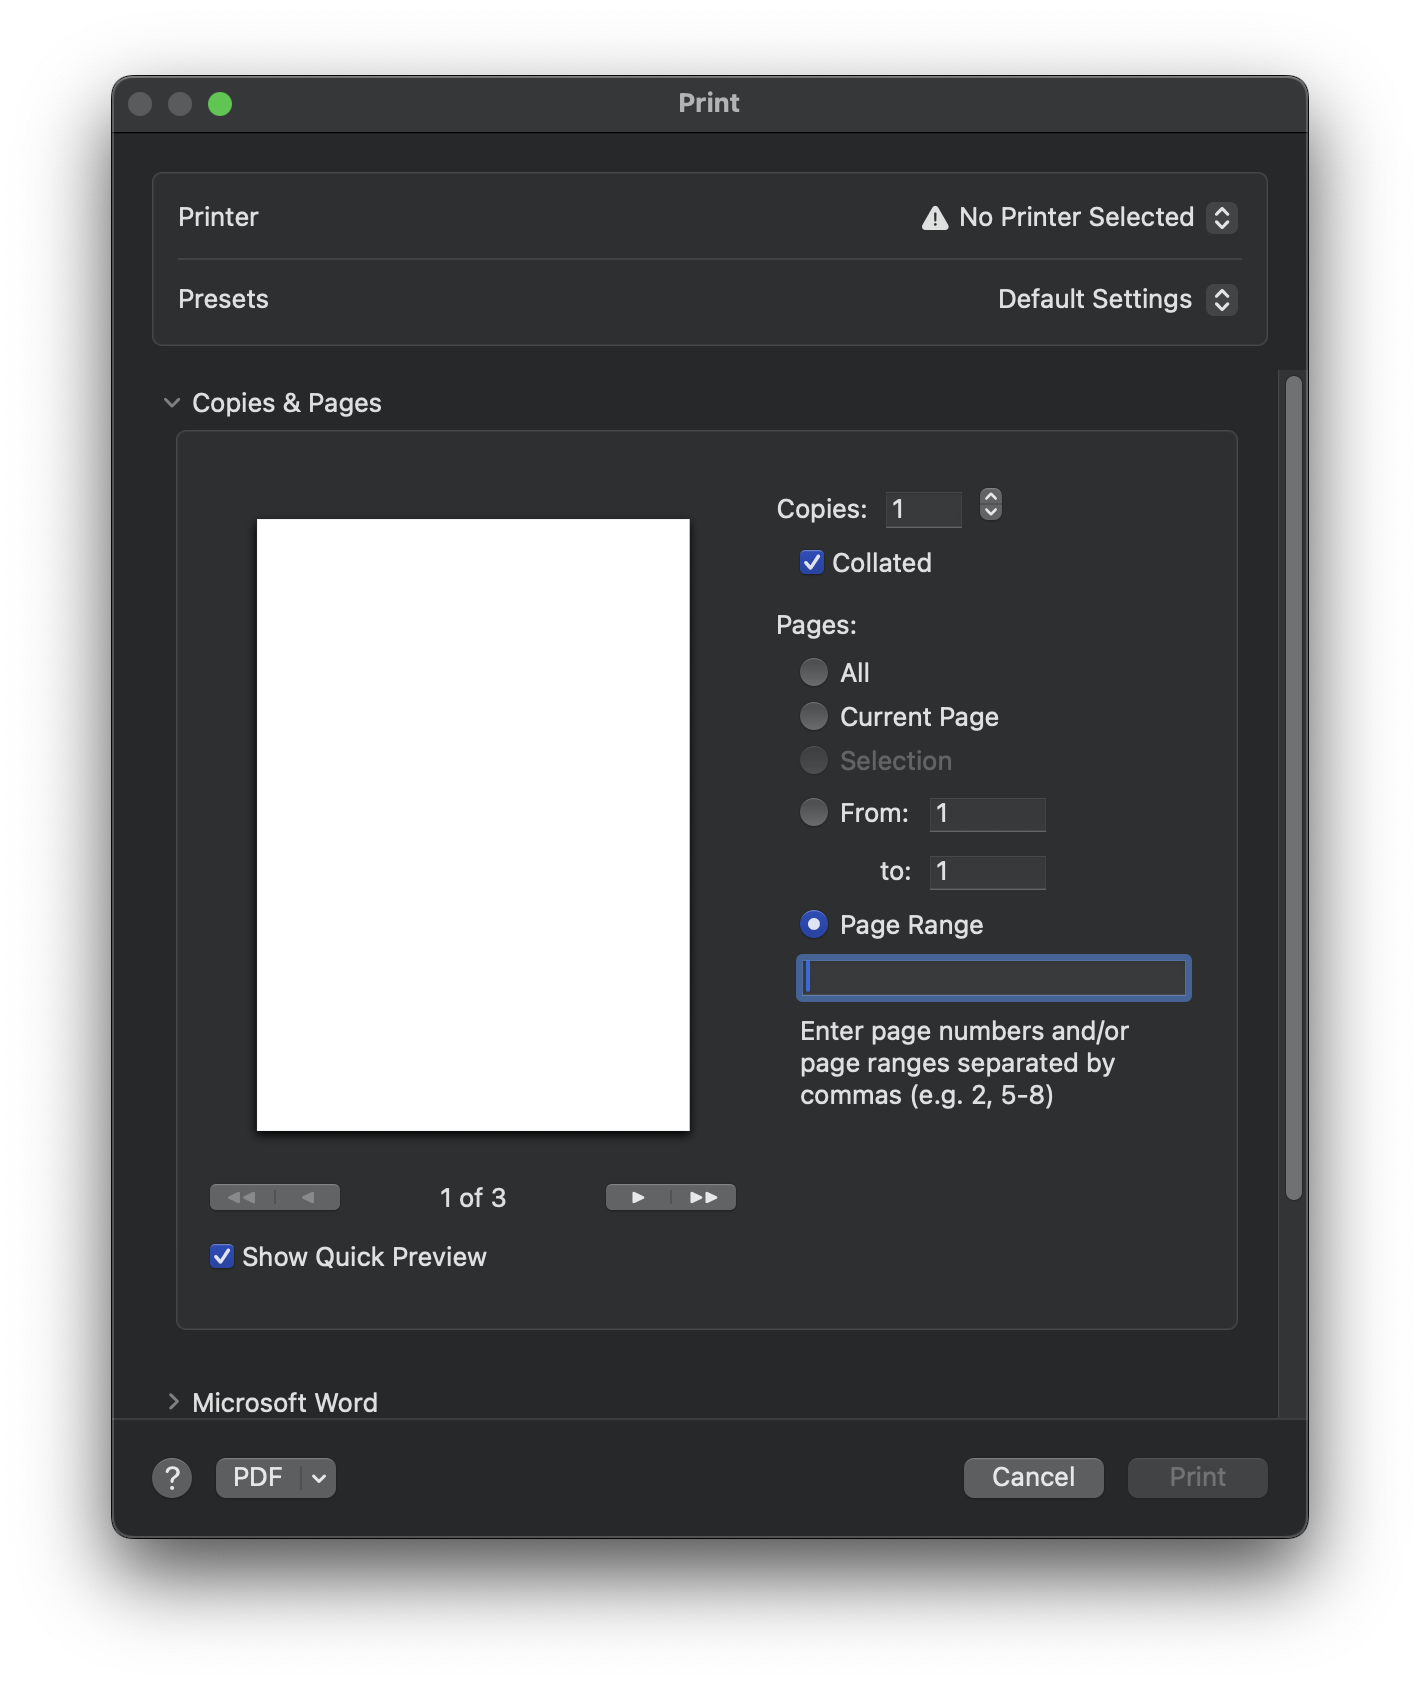
- File → Print (Mac:
Command+P/ Windows:Ctrl+P) - Specify the page range, excluding the blank page
- Set the file format to PDF and save
Method 2. Save As
File → Save As → Browse → set file format to PDF
This method is not supported on Mac, so no screenshot is included.
Conclusion
In Word, blank pages can't be deleted directly — the solution is to hide the paragraph mark inside the previous page. Not knowing this caused me real trouble during document submission. Definitely something to remember.

